Stop Running Injuries : Footstrike the Right Way


Want to get faster but hate the track?
Speedwork doesn't have to be miserable. Our AI coach, Raye, knows hundreds of fun, effective interval sessions you can do anywhere, on your own terms. Try it out instantly with no sign-up. Ask Raye: 'What's a good fartlek session I can do around my local park?' Get instant speed session ideas.
The Truth About Footstrikes: Is There Really a "Right" Way to Run?
For you to understand why there is so much noise about "proper" running form, firstly you have to look at how many of us actually get sidelined. Depending on which study you read, nearly 80% of runners deal with an injury every single year. It’s a massive problem, and for decades, the "experts" have pointed the finger at one thing: the way your foot hits the ground.

The debate usually boils down to the "heel strike" versus the "forefoot strike." For years, we’ve been told that landing on your heel is the enemy, but the science is a lot more complicated than that.
Listen on the run.... Click play below
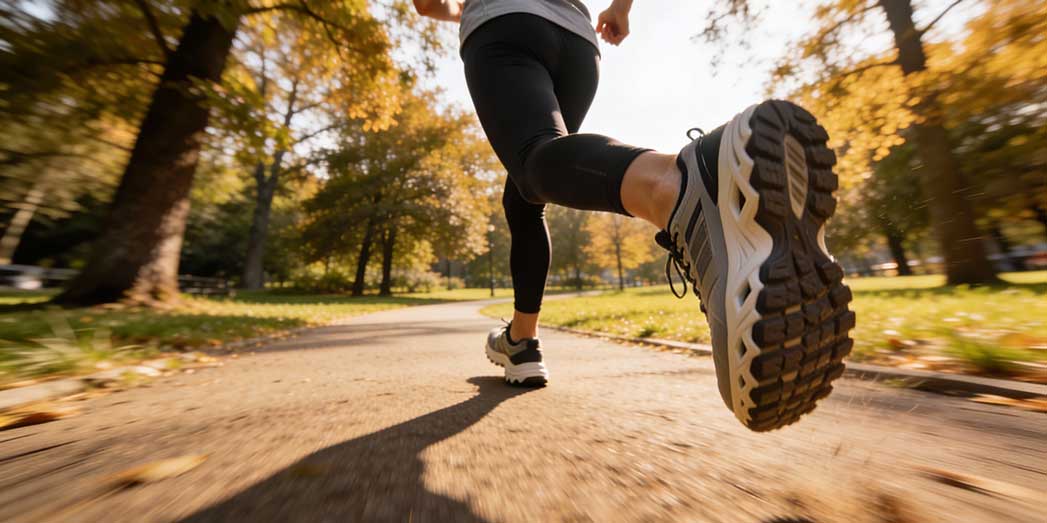
The Three Ways We Land
Most of us land in one of three ways, and it usually depends on what’s on our feet:
-
Rearfoot Strike (RFS): This is the classic heel-first landing. About 94% of recreational runners do this. It’s how most modern cushioned shoes, like a Hoka Bondi or Clifton , are designed to work.
-
Midfoot Strike (MFS): You land flat. It’s the "neutral" ground where your heel and the ball of your foot touch down together.
-
Forefoot Strike (FFS): You land on the balls of your feet. This is often what you see in sprinters or people running barefoot.
The Big Trade-Off: Moving the "Pain" Around
The biggest myth in running is that landing on your forefoot is "safer." It isn't. It’s simply a different way of managing the stress.
Think of it like a budget. When you land on your heel, the impact goes straight through the skeletal chain—your heel bone, your knee, and your hip. This is why heel striking is often linked to "Runner’s Knee" or shin splints.
When you switch to a forefoot strike, you’re essentially "offloading" the knee and asking your muscles and tendons to do the work instead. Your Achilles and your calves act like a massive spring. While this saves your knees, it puts a huge amount of pressure on your lower leg.

Pace stuck in a training plateau?
If your times haven't dropped in months, you likely need a new stimulus. We've trained our AI coach, Raye, on elite programmes to help you break through. Jump in with no sign-up and ask, for instance: 'What is the best threshold session to improve my 10K pace?' Discover ways to break your plateau.
The Reality: If you change your strike to save your knees without strengthening your calves first, you aren't fixing the problem—you’re just trading a knee injury for an Achilles tear.

Carbon Plates Won't Fix Your Form
A "Super Shoe" helps, but only if your biomechanics can handle it. Don't just buy the gear—build the engine. Find Your Runner Profile.
Quick Comparison: Where Does the Stress Go?
| Landing Style | Primary Load Site | Common Risks |
| Heel Strike | Knee & Tibia (Bone) | Runner's Knee, Stress Fractures |
| Forefoot Strike | Achilles & Calf (Tissue) | Tendinopathy, Calf Strains |
The "Cushioning Paradox"
For years, Hoka has been the king of the "maximalist" shoe. Those big, chunky soles are brilliant for comfort, but they’ve created a bit of a paradox. Because the foam is so soft, it actually encourages us to land on our heels because we can’t "feel" the impact.
Ironically, some research shows that the more cushioning you have, the harder you might actually hit the ground because your brain is trying to find a solid surface. This is why some people find that moving to a slightly firmer, more "grounded" shoe actually helps them run lighter.
Is One Way More Efficient?
If you're looking for a "speed hack," changing your footstrike probably isn't it. For most of us, our "habitual" strike—the way we naturally run—is the most efficient.
When you try to force a different style, your body has to work harder to stabilise itself. Even at the elite level, the majority of marathon runners still land on their heels. Efficiency comes from years of the same movement, not from trying to mimic a "natural" style that doesn't feel right for your body.
If You Do Want to Change, Do It Slowly
If you’ve got chronic knee issues and you’re determined to move away from a heel strike, you have to be patient. We’re talking 20 weeks, not 20 days.
-
Build the Foundation: You need to be able to do at least 25 single-leg heel raises with perfect form. If your calves aren't strong enough to support your body weight, a forefoot strike will ruin your Achilles.
-
The Cadence Trick: Instead of worrying about your feet, try to increase your "cadence" (steps per minute) by about 5% to 10%. This naturally shortens your stride and makes you land more softly under your body, rather than reaching out in front of you.
-
The 10% Rule: Never increase your weekly distance or your "new form" training by more than 10% at a time.
The Final Verdict
There is no "perfect" way to run. The best style is the one that keeps you on the road and out of the physio's office. Don't let the trends tell you that your natural gait is "wrong."
Focus on getting stronger, keep an eye on your step rate, and if you’re not injured, don't try to fix what isn't broken.
Top 10 Tips
Don't change unless necessary
The "best" pattern is usually your natural one. Only switch if suffering from chronic knee or hip pain.
Build strength first
Prerequisite: You must be able to perform 25 single-leg heel raises with perfect form.
Focus on cadence
Increase step rate by 5–10%. This naturally prevents overstriding without forcing foot placement.
Follow a long timeline
Patience is essential. Gait retraining typically takes 18 to 22 weeks to become automatic.
Adhere to the "10% Rule"
Never increase weekly volume by more than 10% at a time to avoid injury.
Incorporate plyometric drills
Use pogo jumps and hops to prepare tendons for the "load then explode" mechanism.
Injury Redistribution
You aren't eliminating impact, just moving it. You trade "Runner's Knee" for calf strain risk.
Use real-time feedback
Perform short treadmill intervals with visual markers or auditory cues like a metronome.
Monitor pain strictly
Follow a "pain-free" rule. If pain exceeds 3/10 or lasts 24 hours, regress immediately.
Be cautious with footwear
Minimalist shoes are risky for beginners. Maximalist shoes can encourage a harder heel strike.
If you have decided you need to change running style here are our top 10 tips on full
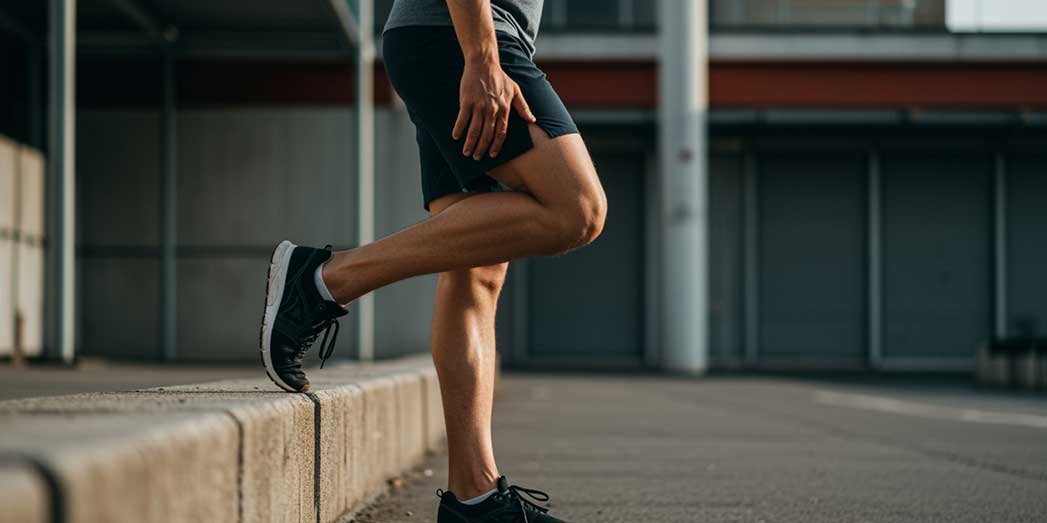
1. Don't Fix What Isn't Broken
Before you even think about messing with your form, ask yourself: do I actually need to? The best way for you to land is usually the way your body already does it naturally. If you aren't currently injured, the risk of switching—like tearing an Achilles or getting a stress fracture in your foot—is way higher than the benefit. Only consider a change if you’re dealing with chronic knee or hip pain that just won't go away.
2. Strength First, Form Later
You can’t just decide to land on your toes tomorrow if your calves aren't ready for it. Switching to a forefoot strike puts an extra load on your Achilles—we're talking nearly 50 times your body weight for every mile. Before you start, you should be able to do at least 25 single-leg heel raises with perfect form. If you haven't got that strength foundation, you're asking for trouble.
3. Forget Your Feet, Focus on Cadence
Instead of overthinking exactly where your foot touches the floor, just try to take more steps. If you increase your "cadence" (your step rate) by about 5% to 10%, your body does the hard work for you. It naturally shortens your stride so you don't "overstride," which shifts your landing away from the heel without you even trying.
4. Think Months, Not Weeks
Patience is the hardest part of this. To really retrain your brain and your body, you’re looking at an 18 to 22-week timeline. Trying to "hack" your running style in 20 days instead of 20 weeks is a recipe for disaster. Your tissues need time to toughen up to the new stresses you're putting on them.
5. Stick to the "10% Rule"
Once you start actually running with your new form outside, don't get carried away. Never increase your weekly distance by more than 10% at a time. If you ramp up too fast, your "new" style will break you before you’ve even had a chance to enjoy it.
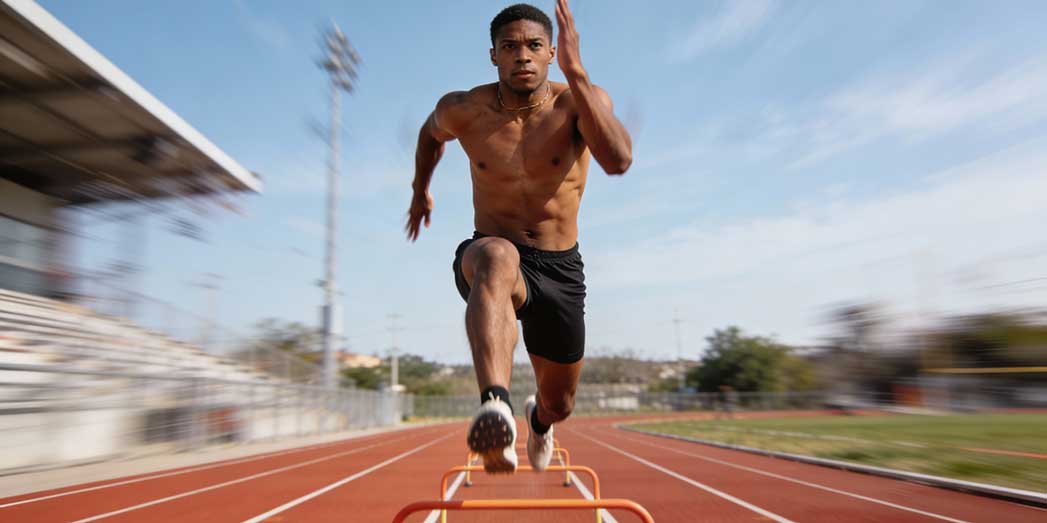
6. Get Bouncy with Plyometrics
You need to teach your tendons how to act like springs. Adding some simple drills like pogo jumps or lateral hops into your routine is a game-changer. It trains the "load then explode" mechanism in your Achilles, which is exactly what you need if you’re moving away from a heavy heel strike.
7. Know Where the Pain is Moving
Changing your strike doesn't make the impact disappear; it just moves the "bill" to a different part of your body. This is the Injury Redistribution Hypothesis . You’re basically trading the risk of "Runner’s Knee" for the risk of calf strains or Achilles tendinopathy. You have to decide which trade-off you’re willing to make.
8. Use a Treadmill and a Metronome
During the early days, the treadmill is your best friend. It’s a controlled environment where you can use a metronome app or a mirror to keep your rhythm steady. These auditory cues help you maintain that higher step rate until it becomes second nature.
9. Use the "3 out of 10" Pain Rule
You’ve got to be strict with your body’s feedback. If you feel any pain that’s higher than a 3/10, or if that pain lasts more than 24 hours, you’ve gone too far. If that happens, back off and go back to the previous week's volume. Ignoring those little niggles is how 25% of people end up with new ankle pain while trying to fix their knees.
10. Be Careful with the Shoes
Don't think that just because you've bought a pair of "zero drop" minimalist shoes, your form will magically fix itself. Switching shoes too fast leads to injury 86% of the time. On the flip side, be aware that those big, cushioned "maximalist" shoes can sometimes hide the impact, making you hit the ground harder than you realise because you can't "feel" the floor.

Shin Splints or Runner's Knee?
These aren't just part of running; they are warning signs. See if your current shoe rotation is causing your joint pain. Take the 2-Minute Audit.
1. The "Safety Net" for Heel Strikers
Brooks Ghost 16
The Ghost is the "gold standard" for the 94% of recreational runners who heel strike. With a traditional 12mm drop (the height difference between heel and toe), it provides a massive buffer for the skeletal chain, protecting the heel and tibia just as your blog suggests.
2. The Grounded Alternative
Saucony Ride 17
If your readers feel "lost" in too much foam, the Ride is a firmer, more stable neutral shoe. It offers a 8mm drop, which is a "sweet spot"—high enough for heel strikers but low enough to encourage a transition toward a midfoot strike without stressing the Achilles too quickly.
3. The "Cushion Paradox" King
Hoka Clifton 9
As mentioned in your post, this is the definitive "maximalist" shoe. It’s perfect for runners with knee issues who need vibration dampening, but it’s the primary candidate for your "Cushioning Paradox" warning—runners need to be mindful not to "stomp" just because they can’t feel the pavement.
4. The Cadence Catalyst
Asics Novablast 4
This shoe has a unique "trampoline" geometry. It’s designed with a rockered sole that helps roll the foot forward. It’s an excellent choice for runners trying to implement your Tip #3 (Focus on Cadence) , as the shoe's shape naturally encourages a quicker turnover.
5. The Midfoot Master
New Balance Fresh Foam X 880 v14
A workhorse shoe that is incredibly versatile. It has a slightly wider platform, making it very stable for those "neutral" midfoot strikers who want a consistent, predictable landing every single time.
6. The "Natural" Transition Shoe
Topo Athletic Magnifly 5
Topo is a great "middle ground" brand. The Magnifly features a 0mm drop (flat), but unlike a "barefoot" shoe, it still has plenty of cushioning. It’s the perfect tool for the 20-week transition you mentioned—allowing the foot to sit naturally without the "sink or swim" risk of a thin minimalist shoe.
7. The Strength Tester
Altra Escalante 4
This is a "Zero Drop" shoe with a foot-shaped toe box. This is for the runner who has mastered the 25 single-leg heel raises . It forces the Achilles and calf to do the work. It’s a "truth-teller"—if your form is off, you’ll feel it here immediately.
8. The "Engine" Builder (Super Shoe)
Adidas Adizero Adios Pro 3
For the section on "Carbon Plates," this is a top contender. It’s designed for efficiency at speed. However, as your blog warns, this shoe requires serious ankle stability. It’s a "Ferrari" that requires a trained driver.
9. The Stability Specialist
Saucony Guide 17
For runners who heel strike and "over-pronate" (foot rolls inward), the Guide 17 uses "Center Path Technology." It doesn't force the foot into a position; it creates high sidewalls to keep the runner centered, reducing the stress on the knees.
10. The Minimalist Entry Point
Merrell Vapor Glove 6
This should come with a "Warning Label" based on your Tip #10 . It is a true minimalist shoe. It’s best used as a secondary tool for short "form drills" or walking to build foot strength, rather than a primary high-mileage trainer.
Comparison Table for Your Readers
| Shoe | Best For | Drop (Heel-to-Toe) | "Feel" |
| Brooks Ghost 16 | Heavy Heel Strikers | 12mm | Soft & Protected |
| Hoka Clifton 9 | Knee Protection | 5mm | Plush & Rockered |
| Altra Escalante 4 | Calf/Achilles Loading | 0mm | Natural & Flexible |
| Asics Novablast 4 | Increasing Cadence | 8mm | Bouncy & Energetic |
